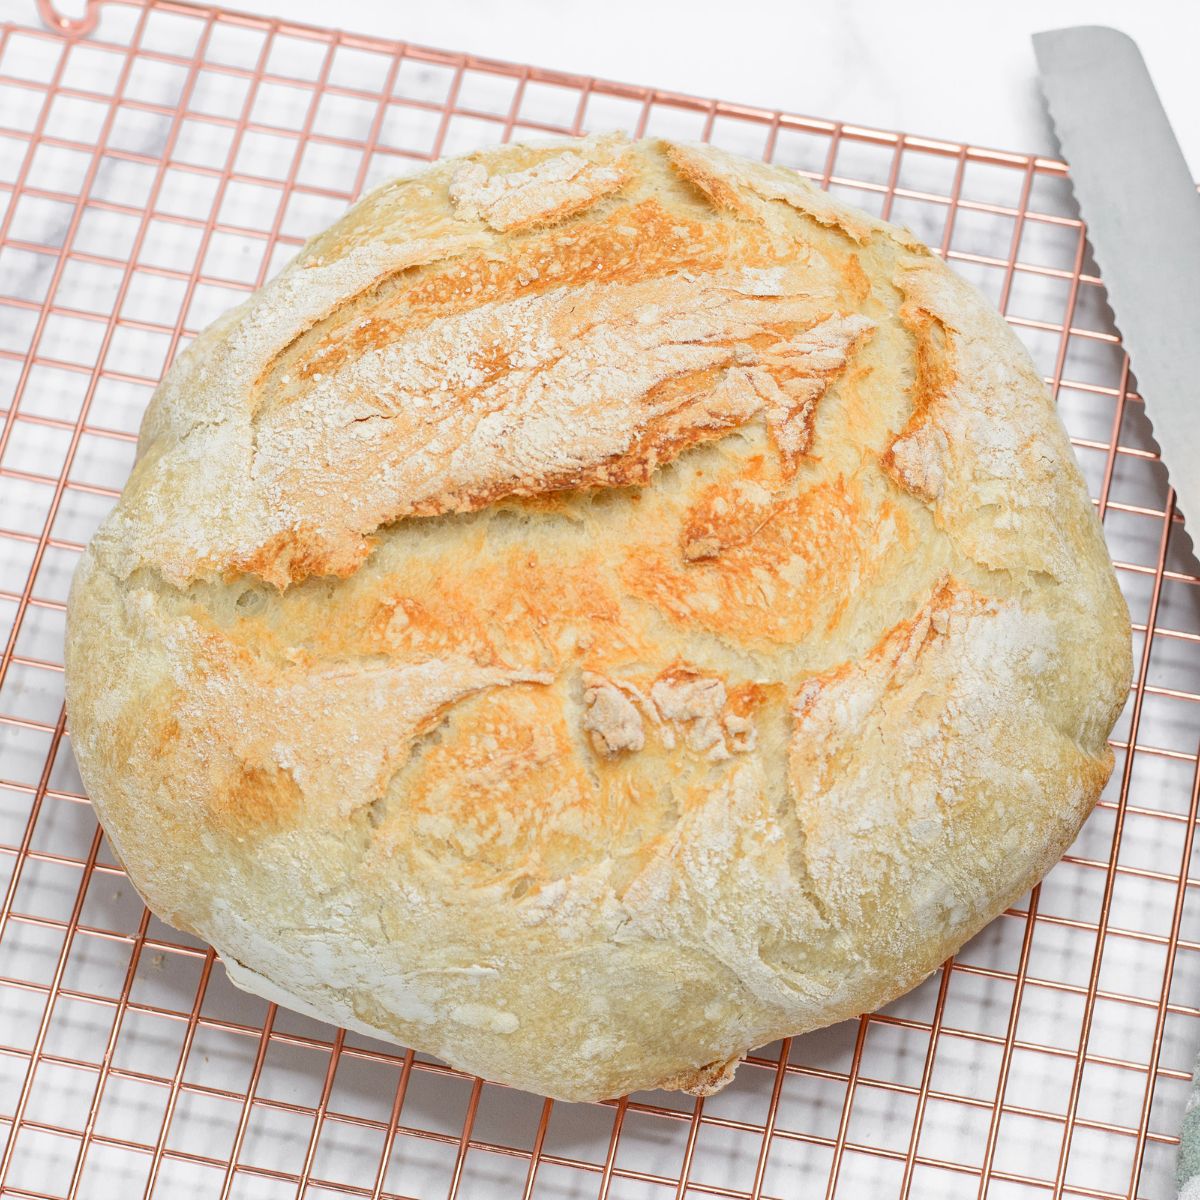
There's something undeniably satisfying about pulling a warm, golden loaf of bread from your oven—especially when that bread is homemade and baked to perfection. Whether you're a seasoned baker or just beginning your bread-making journey, this Dutch Oven Bread recipe is a game-changer. With its crisp crust and soft, airy interior, it’s the perfect companion for sandwiches, bread and jam, or the ever-popular avocado toast.
Why You’ll Love This Dutch Oven Bread
This bread is incredibly versatile. It pairs well with almost any topping, making it an excellent choice for various meals. Plus, it’s a no-knead recipe, which means you get to enjoy all the benefits of homemade bread without the hassle. The long resting time allows the dough to develop deep, complex flavors, while the high baking temperature ensures that the crust turns out irresistibly crispy.
What Makes This Recipe Special?
- Simplicity: With just a handful of ingredients and minimal hands-on time, this recipe is perfect for busy schedules or those new to bread-making.
- Texture: The high hydration dough creates a wonderfully chewy crumb with a crisp crust.
- Flavor: The slow rise time gives the bread a rich, slightly tangy flavor that pairs perfectly with sweet or savory toppings.
Ingredients for Dutch Oven Bread:
- 1 ½ cups warm water (108°F)
- 1 teaspoon active dry yeast
- 2 teaspoons salt
- 1 tablespoon sugar
- 3 ½ cups flour + 2 tablespoons
Instructions for Dutch Oven Bread:
1. Make the Dough:
- In a stand mixer, combine yeast, salt, sugar, and flour. Mix just until everything is nicely blended.
- Pour warm water over the dry ingredients and stir until a sticky dough forms. Don’t worry if it looks a bit messy—this is exactly how it should be!
- Cover the bowl with a towel and let the dough rise on your countertop for at least 5 hours. If you have time, letting it rise for up to 24 hours will enhance the flavor.
2. Shape the Dough:
- Lay a piece of parchment paper on your countertop and sprinkle it with flour.
- Once the dough has risen, gently scoop it onto the parchment paper. Pull the edges of the dough toward the center to form a round shape. Be careful not to knead or punch down the dough—you want to preserve all those lovely air bubbles.
3. Bake:
- Preheat your oven to 450°F. Place your Dutch oven (with the lid on) inside the oven as it heats.
- Once the oven reaches the desired temperature, let the Dutch oven heat for an additional 20 minutes.
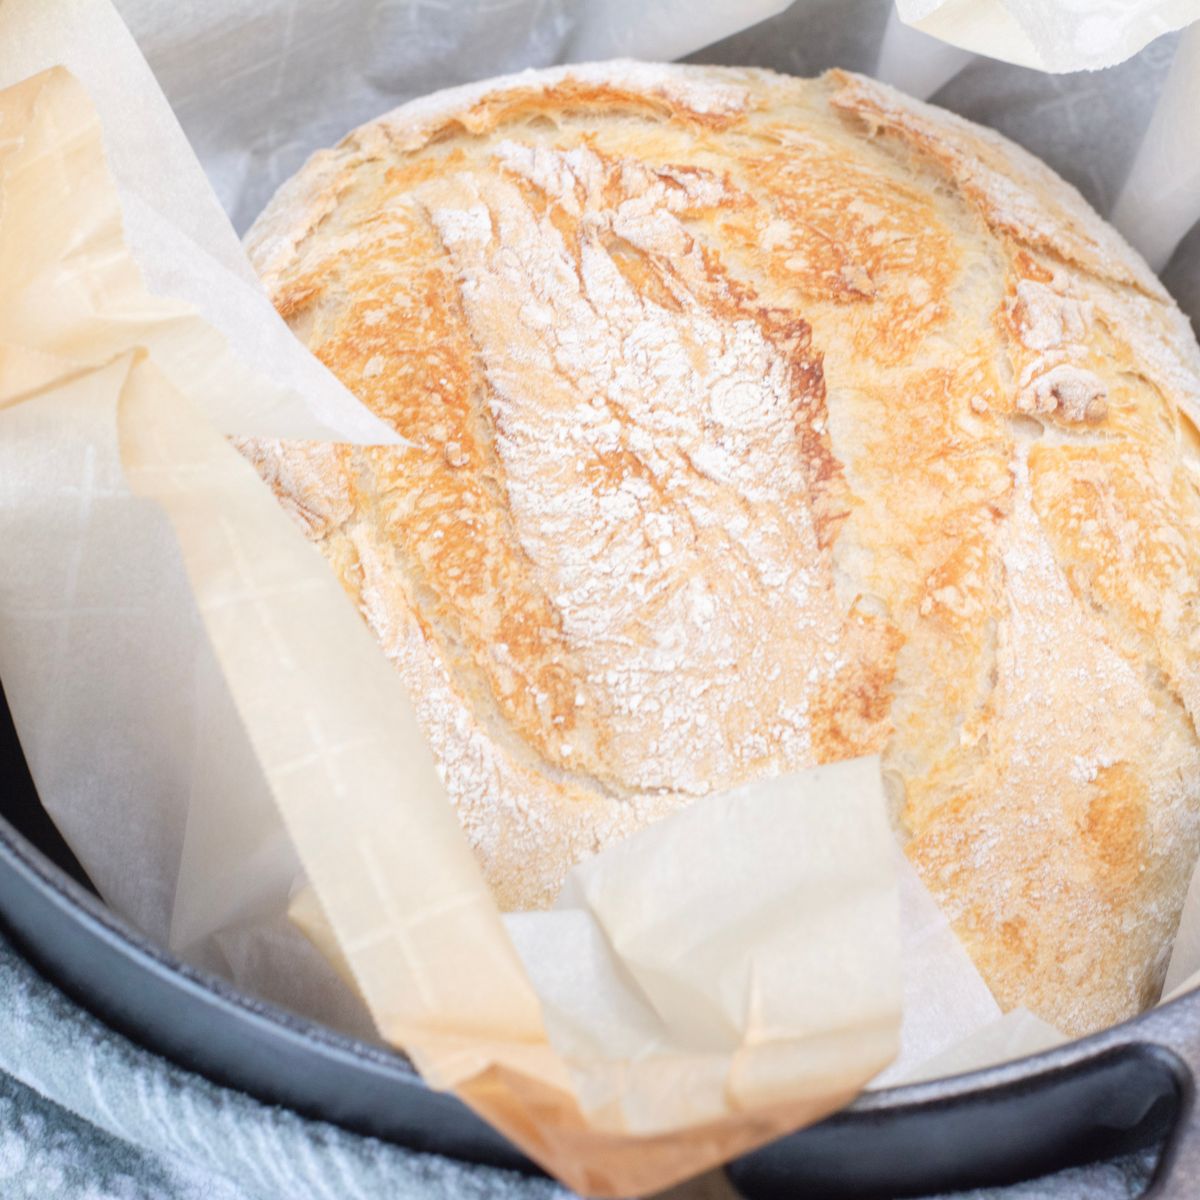
- Carefully transfer the parchment paper with the dough into the hot Dutch oven. If you’re feeling creative, use a sharp knife to score a few lines or designs on the top of the dough.
- Cover with the lid and bake for 35 minutes.
- After 35 minutes, remove the lid and bake for another 5 to 8 minutes, or until the bread reaches a golden brown color that you love.
- Once baked, carefully remove the Dutch oven from the oven. Use the parchment paper to lift the bread onto a cooling rack.
- Allow the bread to cool for at least 20 minutes before slicing.
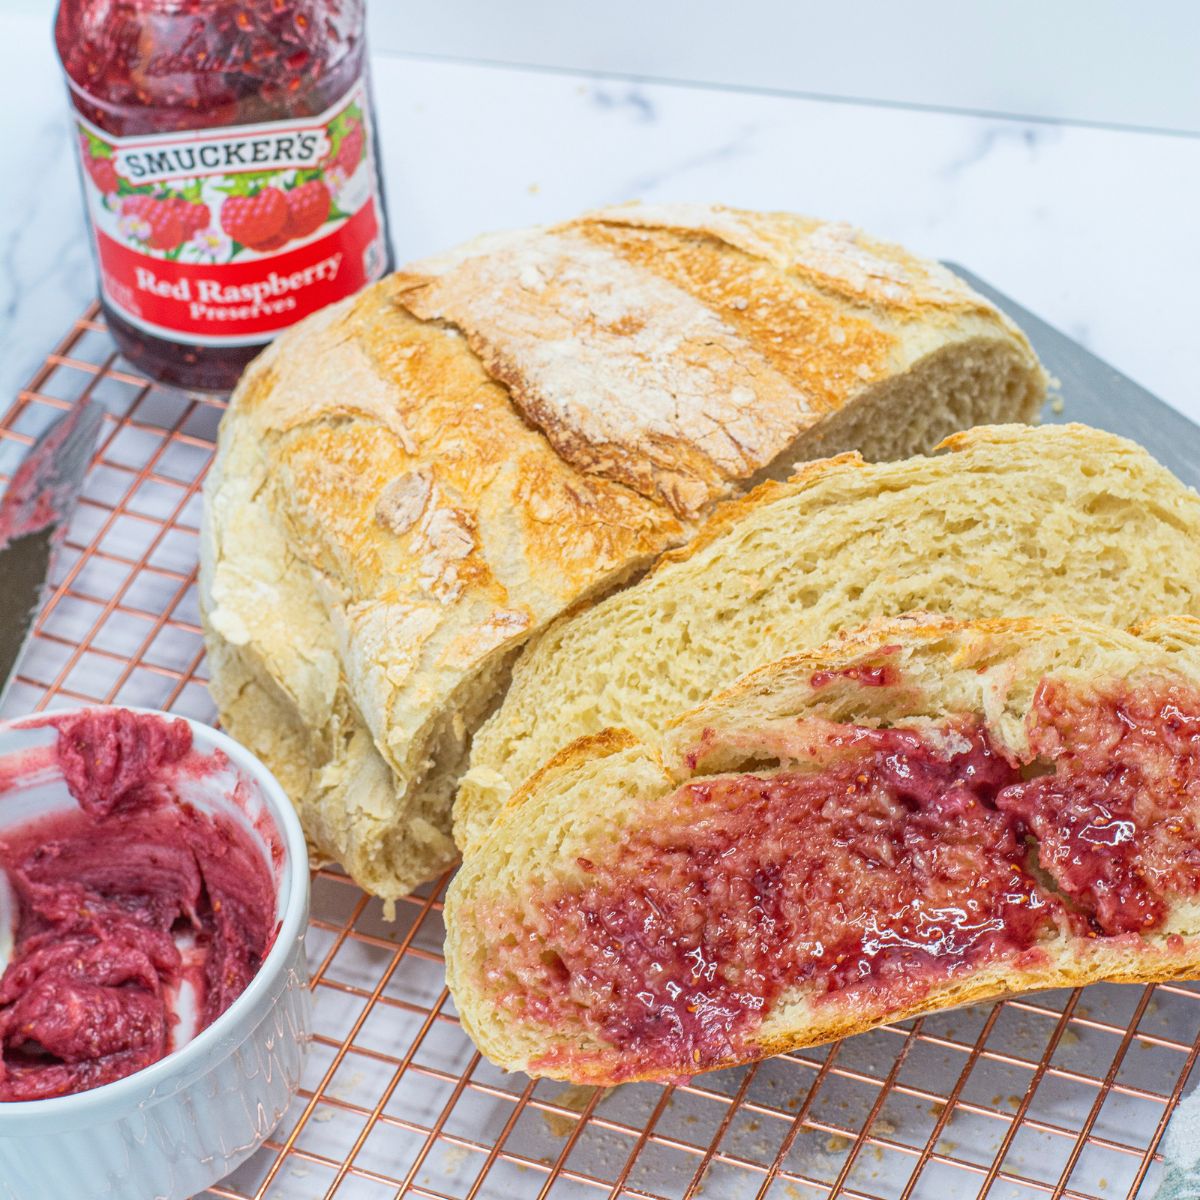
Serving Suggestions
This bread is fantastic with just about anything. Spread on some garlic butter for a savory snack, slather it with your favorite jam for a sweet treat, or use it as the base for a hearty sandwich. And if you're an avocado toast lover, this bread will elevate your toast to the next level.
If you love this recipe, try my homemade bread recipe too!
Dutch Oven Bread
Equipment
- 1 Dutch Oven (deep cast iron pan)
Ingredients
- 1 ½ cups warm water 108 degrees F
- 1 teaspoon yeast active dry
- 2 teaspoons salt
- 1 tablespoon sugar
- 3 ½ cups flour + 2 tablespoons
Instructions
Make the Dough:
- In a standard mixer, combine yeast, salt, sugar and flour. Mix together to just blend nicely. Then pour the warm water over the top and stir until a dough forms. This dough will be super sticky — that is normal!
- Once the flour is all the way mixed in, cover the bowl with a towel and let rise on your countertop for 5 hours minimum. The dough can go up to 24 hours on the counter.
Shape the Dough:
- Place parchment paper on the counter top and sprinkle with flour to coat the surface of the paper.
- After the dough has risen for your desired amount of time (and at least 5 hours), scoop the dough out of the pan onto the parchment paper. Pull the ends of the dough into the middle of the dough until it creates a nice round shape. Make sure to not knead the dough or punch it down.
Bake:
- Preheat the oven to 450 degrees F and place the crock pot, with the lid, in the oven while it’s preheating. Once the oven is heated all the way, keep the crock pot in the oven for another 20 minutes to warm up.
- Once the 20 minutes are up, transfer the parchment paper with the bread on it to the crock pot. Using a knife, slice a couple of lines in the top of the bread if desired (this is where you can have fun with it and make pretty designs if that’s your thing).
- Cover the pot with the crock pot lid and bake in the oven for 35 minutes.
- Once the 35 minutes are up, remove the crock pot lid and bake for another 5 to 8 minutes until a golden brown color of your desire.
- Once complete, remove the crock pot from the oven carefully. Grabbing the parchment paper, place bread with parchment paper on a cooling rack.
- Let cool for at least 20 minutes before slicing. Enjoy with your favorite garlic butter, jam, peanut butter, butter, or whatever you love!


Leave a Reply